7.2 Appendix B: Steps to test FTP Server:
1. Use the Windows key + X keyboard shortcut to open the Power User menu and select Programs and Features.
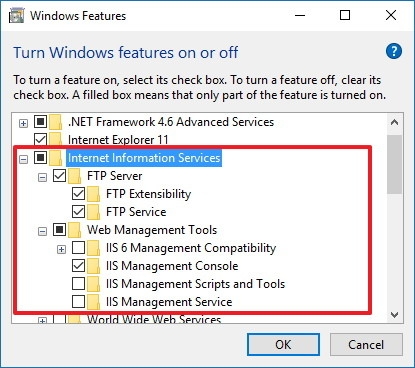
2. Click the Turn Windows features on or off link.
3. Expand Internet Information Services and check the FTP Server option.
4. Expand FTP Server and check the FTP Extensibility option.
5. Check Web Management Tools with the default selections.
6. Click OK to begin the installation.
7. Click Close.
How to configure an FTP site on Windows 10
After installing the necessary components to run an FTP server on your PC, you need to create an DFTP site using the following instructions:
1. Use the Windows key + X keyboard shortcut to open the Power User menu and select Control Panel.
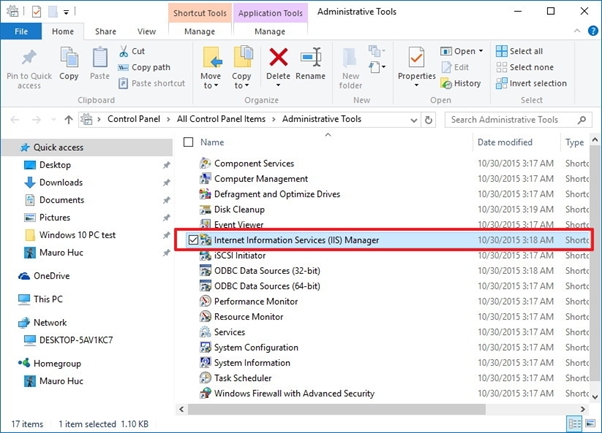
2. Open Administrative Tools.
3. Double-click Internet Information Services (IIS) Manager.
4. Expand and right-click Sites on the Connections pane.
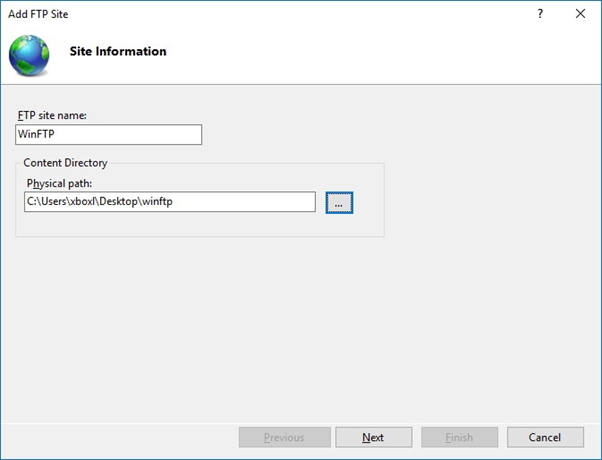
5. Select Add FTP Site.
6. Name your new FTP site and enter the path to the FTP folder you want to use to send and receive files.
Note: You can also use the Make New Folder button to create a specific folder to store your FTP files.
7. Click Next.
8. On Binding and SSL Settings leave all the default settings, but change the SSL option to No SSL.
Note: It's worth pointing out that in a business environment or on an FTP server that will host sensitive data, it's best practice to configure the site to require SSL.
9. Click Next.
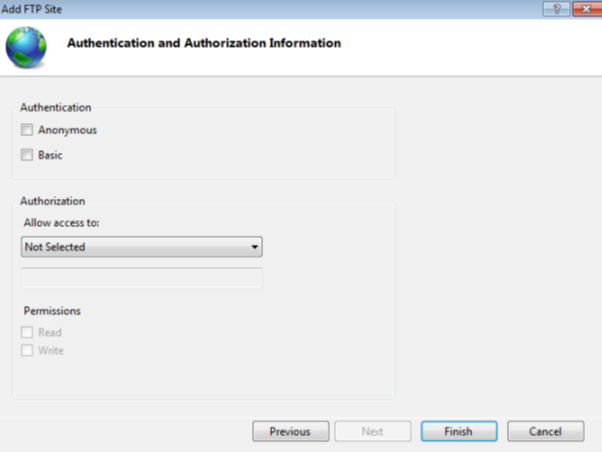
10. The next screen will be the Authentication and Authorization Information Window as can be seen below:
Configure the following settings:
Here Select the Anonymous and Basic check boxes.
Set Allow access to “Anonymous Users”
Set Permissions to Read and Write.
11. Click Finish. And complete the FTP site adding process
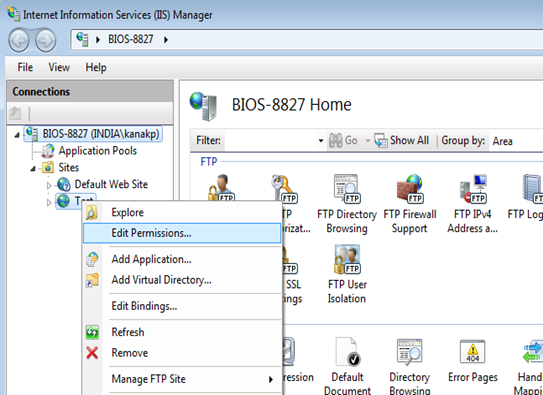
12. After adding FTP we need to set permissions. Follow the below steps:
13. Go to FTP Site that you added in IIS Manager. Right Click and select Edit Permissions.
14. Go to Sharing as below in shown Window.
15. Select Advanced Sharing. And make sharing on and give all the permissions to Everyone and Users.
16. Similarly Go to security in the same Window and give all permissions to the current user.
17. Open created folder(winFTP) and open Properties of folder “ftproot “ and select “Sharing “ tab. Select the “Share” button and add Administrator, and Everyone with “Read/Write” permission.
18. In the “Security” tab, ensure that everyone and Administrator has Read and execute permission.
19. Open the Start menu, do a search for Windows Firewall, and press Enter. In the Left Tab, select “Turn Windows Firewall on or off”, the below shown Window will appear:
Ensure that “Turn off Windows Firewall (not recommended)” is selected under sections Home or work (private) network location settings and Public network location settings.
20. Restart the system.
21. Go to C:\inetpub\ftproot Directory and place some Files or folder such as the test application for Gemini board which has to be transferred.
22. Open Internet Explorer in the development system that is in the same network domain and try browsing to the path by providing ftp://192.168.0.1 in the address bar and press Enter to browse.
Note: 192.168.0.1 is the IP address of Gemini board.
23. All the files placed in the C:\inetpub\ftproot folder of the Gemini board will be available in the Internet Explorer for user to access.
24. In the Internet Explorer Go to View then click on “Open FTP site in Windows Explorer”.
25. There is proper access to FTP Folders. The files can be accessed and copied from this location to local system.
Last updated