2. QUICK START GUIDE
Describes the steps for quick startup of Gemini carrier card.
2.1 Hardware Setup
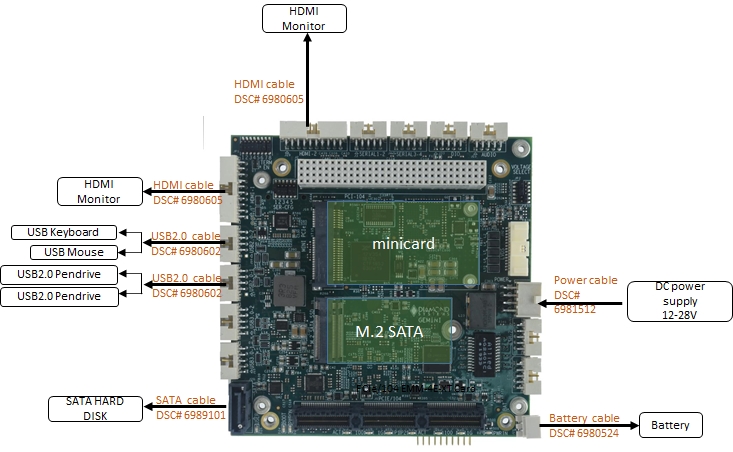
The illustration below shows the minimum hardware set up required to boot the system:
Follow the below steps to do a quick start of Gemini to start testing.
Connect M.2 SATA SSD or SATA Hard disk using SATA cable number 6989101.
Connect the Power supply cable and connect to 12V DC power supply.
Connect an HDMI monitor using DSC cable number 6980605.
Connect USB disk with OS to be installed to one of the USB ports.
Connect Keyboard and mouse to USB ports.
Ensure all the connections are intact.
Double-check the power supply.
Power on the system.
On the initial boot, the system will prompt for installation settings. Set up as required.
Once the OS installation is completed, the Desktop is loaded. The system is now ready to be used.
For the easiest startup, we recommend to but the development kit which includes a cable kit and Flash drive with the programmed OS or at least the SDK with the OS.
In case the customer wants to install OS by themselves then please follow Section 2.2 to install the OS.
We recommend to buy cable kit CK-GEM-01 for Gemini for quick startup. In case the customer wants to build the cables themselves click here for the cable drawings.
2.2 Software Setup
In order to use Gemini SBC, an operating system needs to be installed. This OS can be either installed in the M.2 SSD or an external HDD. Depending upon the purchase made, an M.2 SSD may or may not be included with the purchase kit.
The software setup is as described below:
Download the necessary OS on a workstation. It is recommended to download the OS in ISO format.
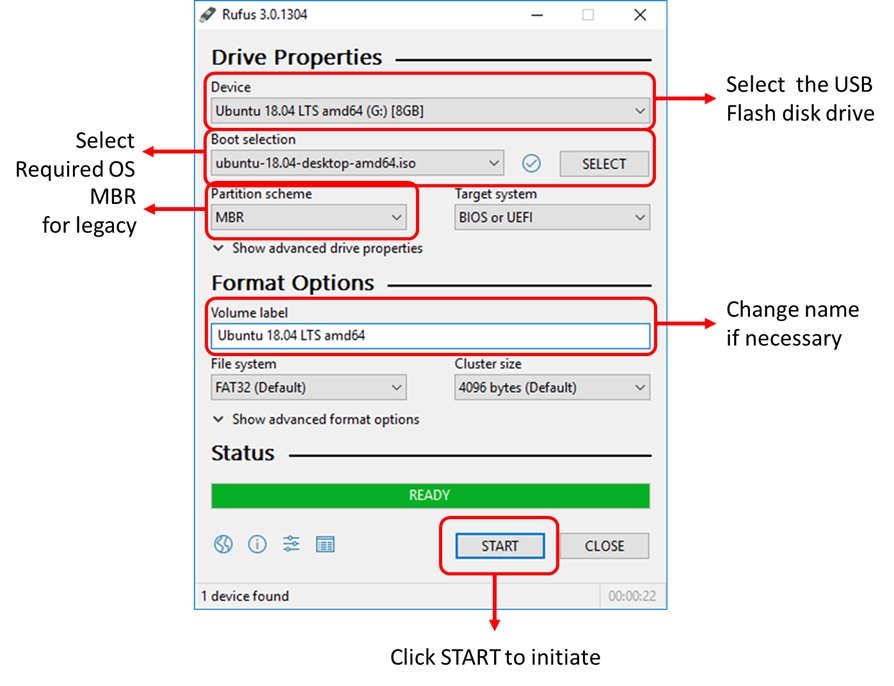
Download the Rufus utility program to create a bootable USB flash disk. Rufus can be downloaded here: Rufus
Insert a USB flash disk in the workstation & launch Rufus
Follow the Rufus settings & initiate the bootable USB flash disk creation process
Last updated

